Understanding Graduated ND Filters
The Basics of Graduated Filters for Photography
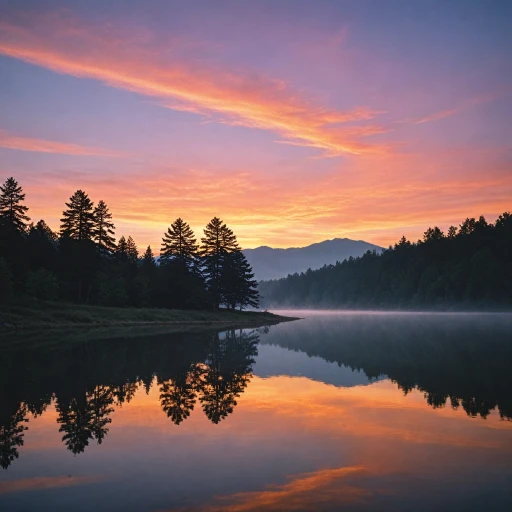
Graduated Neutral Density (GND) filters are essential tools in landscape photography, particularly when capturing breathtaking sunsets. These filters consist of a neutral density that transitions from dark to clear, allowing you to balance the exposure between the bright sky and the darker landscape in your images. This transition ensures that you achieve a perfectly exposed photograph, without the harsh contrast that often occurs during sunset photography.
The key feature of a graduated filter is its ability to reduce the dynamic range of a scene. By using a GND filter, photographers can prevent overexposed skies while maintaining detail in the foreground. There are two main types of transitions: soft graduated and hard edge. A soft graduated transition is suitable for scenes with uneven horizons, whereas a hard edge GND filter works best with straight horizon lines.
Understanding the function of different density filters is crucial, as the amount of light reduction is measured in stops. Standard options include 1, 2, and 3 stops of light reduction, which provide varying levels of light control, depending on the scene's brightness. Utilizing the appropriate density can significantly enhance your sunset photography, resulting in images with well-balanced exposure.
For those seeking practical guidelines on using these filters, factors such as filter holder preferences and shutter speed adjustments are vital components to explore further. Additionally, it's essential to avoid common mistakes like improper placement of the graduated filter during landscape photography. As you delve deeper into the practice, the nuances of these filters become increasingly apparent, offering enriched creative possibilities.
For more detailed insights on the specific benefits of a 77mm graduated neutral density filter in enhancing your sunset shots, consider exploring enhancing sunset photography with a 77mm graduated neutral density filter. This resource offers an in-depth understanding of maximizing the potential of graduated filters in capturing awe-inspiring images.
Why Use a Graduated ND Filter for Sunset Photography?
The Importance of Graduated Filters in Capturing Sunsets
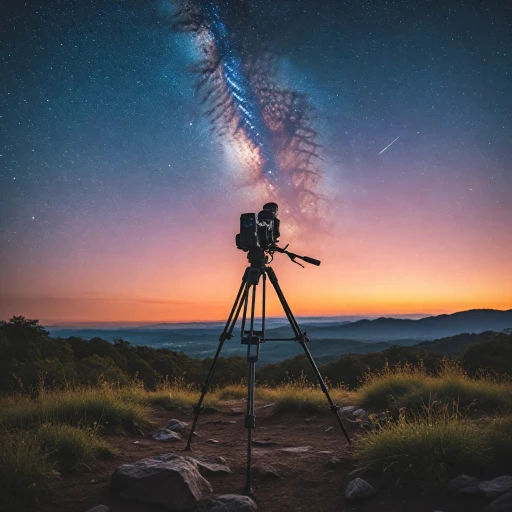
When it comes to achieving stunning sunset photography, using a graduated filter can significantly enhance your images. The primary purpose of a graduated ND filter is to balance the exposure between the bright sky and the darker foreground. This is particularly essential during sunset, when the sky's luminance often outshines the landscape. Graduated neutral density (ND) filters allow you to capture the full dynamic range of a scene, ensuring that both the sky and the land are well-exposed. This balance helps in bringing out the vivid colors of the sunset without sacrificing detail in the shadow areas.Maintaining Control Over the Sky's Exposure
As the sun dips below the horizon, the sky tends to become bright, leaving the foreground underexposed. Graduated ND filters come to the rescue by reducing the light entering the lens from the sky. This ensures that the camera sensor captures a more balanced exposure. Transitioning from a lighter to darker density, these filters assist photographers in controlling how much light touches different parts of the image. Long exposure shots during sunset often struggle without the aid of a graduated filter. Without a gnd filter, the sky can be blown out, losing all detail and saturating the colors beyond correction in post processing.Enhancing Landscape Photography with the Right Grad Filters
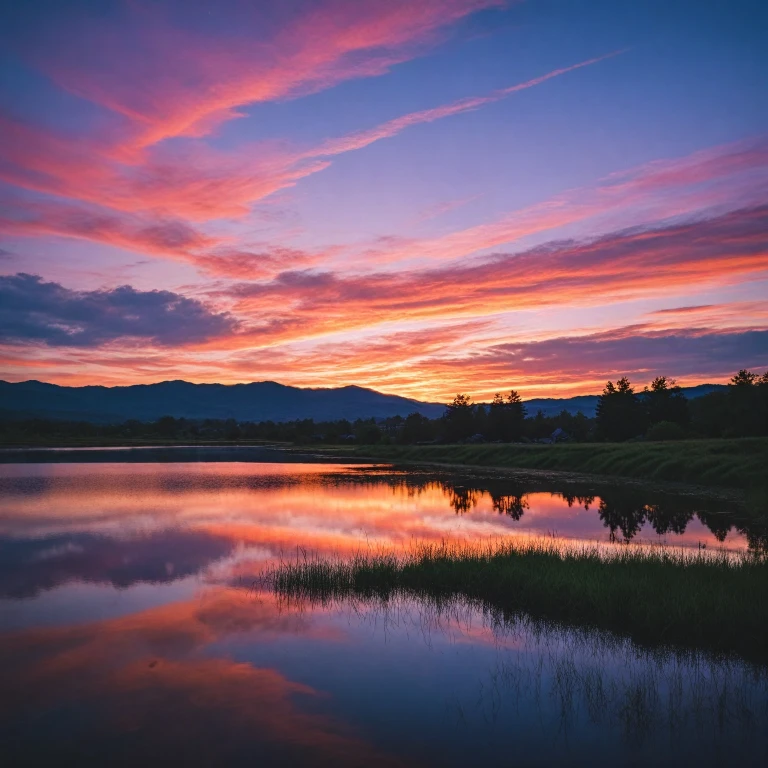
Choosing the correct type of density filter can influence the quality and effectiveness of your sunset pictures. Hard edge or soft graduated filters vary in density and transition, permitting photographers to adapt to varying light conditions and scenes. For instance, a hard edge filter is suitable for scenes with a clear horizon line, whereas a soft graduated density filter would be ideal for uneven or mountainous terrain. The right gnd filter will have a profound impact on how well an image represents the scene's light and color, especially at sunset. By keeping the sky's hues and shadows in check, photographers gain creative control without reliance solely on post-processing adjustments, ensuring authenticity and artistic finesse in their work.Types of Graduated ND Filters: Which One is Right for You?
Selecting the Appropriate Graduated ND Filters for Your Photography Needs
Choosing the right graduated neutral density (GND) filter for your sunset photography requires understanding the different types available, each tailored to suit varying light and scene conditions. These filters play a crucial role in balancing the exposure between the bright sky and the darker landscape, providing a seamless transition that enhances the beauty of your sunset images. When it comes to types of GND filters, the primary distinctions lie in the density and transition of the filter.- Soft Graduated ND Filters: These provide a gradual transition from clear to neutral density, best suited for scenes with an uneven horizon line or when photographing landscapes with trees or structures reaching into the sky. They allow a smooth blend, particularly useful in capturing subtle light changes during sunset photography.
- Hard Graduated ND Filters: Contrary to the soft grad, hard GND filters offer a more abrupt transition between clear and dense areas. They are excellent for straightforward horizon lines like seascapes, where a distinct boundary is present. This kind of filter helps in keeping the sky from being overly exposed while maintaining detail in the landscape.
Factors to Consider When Selecting a Graduated ND Filter
Considerations for Choosing the Perfect Filter
When selecting a graduated neutral density (GND) filter for sunset photography, several factors come into play. Ensuring your choice aligns with your specific needs will not only enhance your sunset captures but also streamline your landscape photography process.- Transition Type: Choosing between hard and soft transitions is crucial. A hard edge filter is ideal for scenes with a clear-cut horizon, such as ocean views or flat landscapes, where the sky and land meet sharply. Conversely, a soft graduated filter works best when the horizon is irregular or obstructed, as it provides a more gentle transition from light to dark.
- Filter Strength: The intensity of a GND filter is measured in stops, dictating how much light is reduced. For dramatic sunset photography, a filter ranging from 2 to 3 stops can effectively balance the exposure between the bright sky and dimmer foreground, facilitating a proper dynamic range in your images.
- Filter Size: Consider the diameter of your camera’s lens to ensure compatibility with the filter holder. Graduated filters typically come in standard sizes, so verify your lens measurements to avoid any mishaps during your shoot.
- Optical Quality: Opt for filters made from high-quality optical glass to maintain the sharpness and clarity of your images. Poor-quality density filters can introduce unwanted color casts or reduce the overall quality of your photos.
- Brand and Build: Reputable brands often offer superior build quality, ensuring longevity and dependable performance. Investing in a well-constructed GND filter contributes to consistent results across various lighting conditions.
Practical Tips for Using Graduated ND Filters at Sunset
Mastering the Use of Graduated ND Filters at Sunset
When it comes to capturing the perfect sunset, using a graduated neutral density (GND) filter can make a significant difference in your landscape photography. Here are some practical tips to help you make the most out of your GND filters during sunset photography:
- Choose the Right Transition: Depending on the scene, decide between a hard or soft graduated filter. A hard edge is ideal for scenes with a distinct horizon, while a soft graduated filter works better when the horizon is irregular, ensuring a smoother transition in the sky.
- Adjust the Exposure: Balance the light in your image by adjusting the exposure. The GND filter will help control the bright sky, allowing you to capture more details in the darker foreground without overexposing the sky.
- Position the Filter Correctly: Use a filter holder to position the GND filter accurately. Align the transition line with the horizon to ensure the sky and the landscape are balanced in terms of light.
- Experiment with Stops: Depending on the dynamic range of the scene, choose a GND filter with the appropriate density. A 2-stop or 3-stop filter is usually effective for sunset photography, but experimenting with different densities can yield interesting results.
- Consider Long Exposure: To add a dramatic effect to your sunset images, try using long exposure. This technique can create a smooth, dreamy look in the sky and water, enhancing the overall mood of the scene.
- Review and Adjust: After taking a shot, review the image on your camera’s screen. Make any necessary adjustments to the filter position or exposure settings to perfect the balance between the sky and the landscape.
By understanding these practical aspects of using GND filters, you can significantly enhance your sunset photography, capturing stunning images with balanced exposure and rich colors.
Common Mistakes to Avoid with Graduated ND Filters
Missteps to Steer Clear of When Using Graduated ND Filters
Mastering the art of using graduated ND filters requires understanding and practice to avoid common pitfalls in landscape photography. Here are some critical mistakes to be mindful of:- Incorrect Filter Alignment: Ensure that the grad filter is precisely aligned along the horizon. Misalignment could lead to uneven exposure, where the gradation does not properly transition across the scene, affecting the light balance in the sky versus the landscape.
- Choosing the Wrong Density: Opt for the correct density stops based on the dynamic range of the sunset you're capturing. Insufficient density can lead to overexposed skies, while excessive density might darken the sky too much, making post processing challenging.
- Inappropriate Filter Type: Using a hard graduated filter when a soft graduated filter is needed, or vice versa, may produce unwanted lines across your image. Consider the landscape's nature and horizon shape, as described in the types of filters segment.
- Ignoring Lens Effects: Placing the graduated filter too close to the lens or the filter holder mechanism can result in vignetting at wide angles, especially in long exposure shots. Double-check with your camera's live view to ensure the optical glass does not interfere with the lens.
- Neglecting Transition Awareness: The transition of the graduated density filter is crucial; a smooth transition is more forgiving, while a hard edge might require precise placement to prevent overly sharp contrast between sky and land.