Understanding the Concept of a Lens Sweet Spot
Grasping the Basics
Understanding the "sweet spot" of a lens is vital for photographers striving to attain optimal image quality. Essentially, the sweet spot refers to the specific aperture setting whereby the lens delivers its sharpest images. This is a point where the various aberrations are minimized and resolving power is maximized. For lenses like the popular 24-105mm range, both Canon and Sony offer models that require meticulous consideration to tap into their full potential. The sweet spot is often not the widest aperture available. Instead, it's found a few stops down from the maximum, where depth of field and sharpness converge beautifully. Why is the sweet spot important? The distinction in sharpness and image quality can be particularly evident around the corners of your images. Monitoring factors such as ISO, focus, and aperture can significantly enhance the clarity and depth of field in your photographs, making it imperative to understand where your lens performs best. For further detailed insights, you can explore our resource on understanding lenses and their optimal settings.Technical Specifications of a 24-105 Lens
Examining the Key Features of the 24-105 Lens
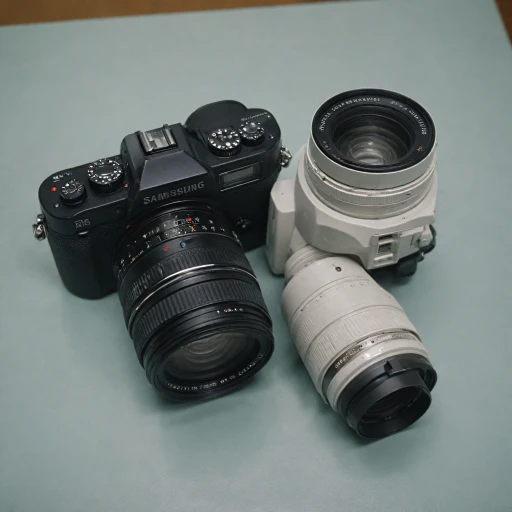
When exploring the capabilities of a 24-105 lens, several technical specifications stand out, impacting image quality and performance. This type of lens can be found in both Canon and Sony models, each offering unique attributes that cater to different photography needs. Firstly, the focal length of the 24-105 lens is a significant aspect. This flexible range provides photographers with the versatility to capture various scenes, from wide landscapes to standard portraits — all without the need to change lenses. With such a comprehensive focal length range, this lens is considered a 'standard zoom,' making it a favored choice among enthusiasts and professionals alike. The aperture settings are another critical factor contributing to the lens's functionality. Most models of the 24-105 lens feature an aperture range of f/4 or similar, which allows for consistent image quality across a broad spectrum of lighting conditions. While not a 'widest aperture' lens, it achieves a balanced depth of field and sharpness, suitable for most photographic scenarios. Image stabilization is a vital component of this type of lens, especially when working in low-light situations or without a tripod. Both Canon's USM lens and Sony's OSS (Optical SteadyShot) technology help to minimize camera shake, ensuring that your images maintain sharpness and clarity. Size and weight can also influence a lens's usability, particularly for photographers who travel or shoot for extended periods. The 24-105 lens generally offers a lightweight design, allowing for greater maneuverability and comfort. Finally, for those seeking to maintain the lens's condition and performance, it's crucial to consider protection options like lens cases. Selecting the right lens case is essential to safeguarding your investment. Choosing the right lens case can help prevent damage and prolong the lens's lifespan. Overall, the 24-105 lens's design and features provide photographers with a versatile tool that supports various photographic styles and situations.Factors Affecting Image Quality in Lenses
Influencing Elements on Lens Clarity
Understanding the factors that influence image quality is crucial when seeking the optimal performance of a 24-105 lens. Given the popularity of this lens range, both Sony and Canon have their versions that are equipped with various technological enhancements to aid in capturing high-quality images.
One key factor is the aperture setting. When utilizing cameras with a full-frame sensor, the aperture significantly impacts the sharpness and depth field of your images. Shooting with the widest aperture may not always result in the sharpest images. In fact, for most lenses, the sweet spot where maximum sharpness is achieved is a few stops down from the widest aperture.
Another essential consideration is focus. With both Sony and Canon's advanced autofocus systems, ensuring precise focus can make a tremendous difference. It’s worth experimenting with your settings, especially if you're using manual focus, to see where the lens performs best. A lens with a USM (Ultrasonic Motor) or OSS (Optical SteadyShot) offers enhanced focusing performance and image stabilization, aiding in capturing sharp images even in challenging lighting conditions.
Additionally, the zoom lens capability and standard zoom range can influence image quality. A 24-105 lens offers a versatile focal length range that provides flexibility in various shooting scenarios, but it’s important to know that the performance can vary at different points within this range. Lens corrections, either in-camera or through editing software, can also help address distortions or other quality issues, ensuring the final images are crisp and clear.
To maximize your lens's performance across different situations, paying attention to these factors is vital. For improved comprehension of how lighting can affect your photography, consider reading about three-light studio lighting kits, as lighting conditions are often interconnected with lens performance.
Identifying the Sweet Spot in a 24-105 Lens
Finding the Ideal Aperture Setting for Optimum Image Quality
To pinpoint the sweet spot of a 24-105 lens, understanding the relationship between aperture and image quality is essential. Generally, the lens sweet spot is located near the mid-range of its aperture settings. This balance helps achieve enhanced sharpness and clarity, minimizing issues like vignetting and chromatic aberrations that often occur when shooting wide open or fully stopped down. The sweet spot typically falls between f/5.6 and f/8 for full frame lenses, like those from Canon or Sony, as these settings usually provide optimal sharpness across the image. At this point, the camera can capture images with rich detail and reduced corner softness. Additionally, focusing on the aperture setting affects depth of field and can help achieve that desired blur or sharp focal clarity. A camera’s ISO setting and shutter speed also play critical roles in determining the final image quality, so adjusting them to complement the aperture can further refine results. Utilizing lens corrections available in-camera or during post-processing can also enhance image quality by addressing distortions typical in zoom lenses, which can otherwise detract from image clarity, even at the lens’s sweet spot. By identifying where the 24-105 lens performs at its best, photographers can ensure they are capitalizing on its capabilities, maximizing performance with each shot.Practical Tips for Maximizing Lens Performance
Optimizing for Maximum Sharpness and Performance
When aiming to achieve the best performance from your 24-105 lens, it’s important to follow specific practical tips focusing on the interaction of key elements such as aperture, focus, and image stabilization.
To enhance image quality, setting the aperture to the right level is crucial. The lens's sweet spot often lies around two to three stops from its widest aperture. For example, if your lens opens up to an aperture of f/4, aiming for f/8 could yield optimal sharpness and detail. This balance allows for improved depth of field while minimizing potential issues like vignetting.
Accurate focus is essential. Engaging features like Canon USM or Sony OSS for consistent autofocusing can help in maintaining clear and sharp images. Fine-tuning focus can also help, especially when working within varying focal lengths or trying to capture intricate details in wide or full frame shots.
Utilizing image stabilization effectively can significantly enhance picture quality. Activating stabilization features on lenses (like the Canon USM) mitigates the effects of minor handshakes or movements, particularly during slower shutter speeds or while the zoom lens is extended. This is crucial for handheld photography, where clarity and richness in color are vital.
Consider the influence of ISO settings to control exposure and maintain the texture and vibrance of images. Keeping ISO at the lowest possible setting for your light condition will help preserve the quality and minimize noise, crucial in capturing sharp and high-quality images.
Remember to periodically perform lens corrections. These adjustments can compensate for distortions across the aperture range and length range, thus enhancing the corner-to-corner sharpness of your images.
Ultimately, focusing on these key practices will help maximize the full potential of your lens, bridging the lens's technical capabilities with your artistic vision to capture images with stunning clarity and depth.