The Essentials of Studio Lighting
Mastering Studio Lighting Basics
At the heart of any successful photoshoot or video production lies a comprehensive understanding of studio lighting. Whether you're a budding photographer or a seasoned videographer, building a solid foundation in lighting techniques can significantly impact the quality of your work.
First and foremost, it's essential to familiarize yourself with the different types of lights commonly used in studios:
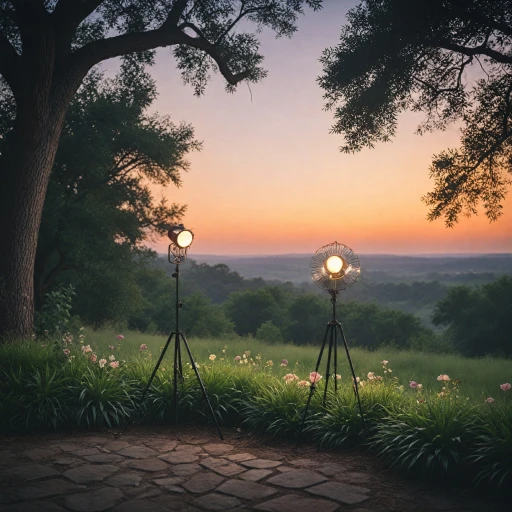
- LED Lights: Economical and versatile, these lights are often embraced for their adjustable color temperatures and energy efficiency.
- Softboxes: These are crucial for mitigating harsh shadows and creating soft, diffused light that enhances the appearance of subjects.
- Panel Lights: Known for their flexibility, panel lights are lightweight and can easily be adjusted to achieve the desired lighting effect.
Each variety of light serves a unique purpose, contributing to the overall setup's versatility.
When determining which kit best suits your needs, consider the price difference between buying lights separately or as part of a kit. At times, the sale price for pre-packaged kits may offer significant savings over purchasing items at regular price. Not to mention, purchasing a lighting kit often ensures compatibility between different elements, such as gvm LED panels and accompanying accessories.
Taking control of your studio lighting setup will also involve understanding how to direct, shape, and modify light. This mastery enables even beginners to create professional-grade images and videos, all while accounting for the varying qualities of different light sources.
And remember, as you navigate the myriad of equipment options available, being informed about products, such as the Canon F1 Flash Adapter, can further enhance your lighting strategy and expand your creative capabilities. Enhance your setup with the right accessories and perfect your craft.
Breaking Down the Three-Light Setup
Dissecting the Role of Each Light in the Setup
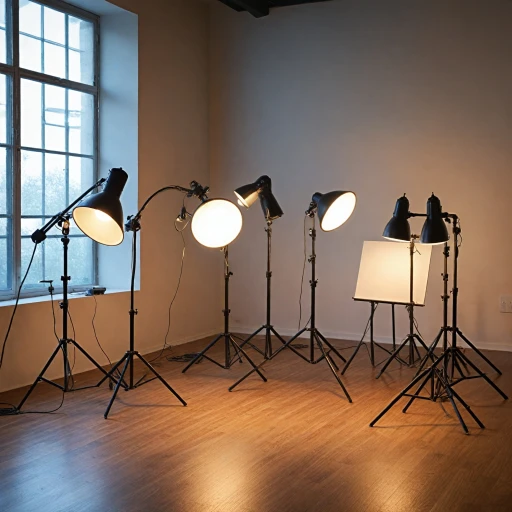
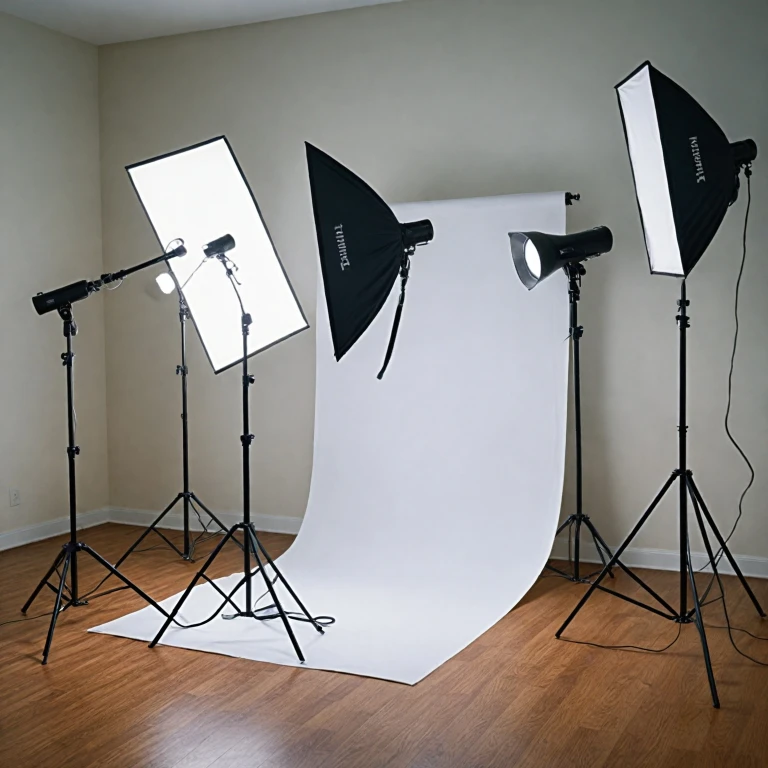
In a three-light studio setup, understanding each element is crucial to crafting the ideal photograph, capturing mood, and setting the tone. One core advantage of a three-light kit is its capacity to provide ample lighting choices for different photo or video scenarios. Let's break it down:- Key Light: This is the most important light of your setup, often responsible for the majority of light on your subject. A softbox placed over your key light can diffuse illumination, preventing harsh shadows. LED panel lights, especially those with adjustable RGB settings, add versatility in photography lighting, letting you experiment with different moods and colors.
- Fill Light: Positioned on the opposite side of your key light, the fill light's main function is to reduce harsh shadows cast by the key light. Adjusting the intensity of your fill light can add depth and dimension to your photos, all while maintaining a natural look. Many studio lighting kits offer LED options for easy control and adjustments.
- Back Light or Edge Light: Also referred to as rim lighting, this light adds separation between your subject and the background. It also adds a beautiful highlight that can emphasize contours or textures. Using a well-placed lume cube or panel lights can enhance detail and create a polished, professional look.
Key Lighting Techniques for Beginners
Mastering Basic Lighting Strategies
Achieving professional-quality photography requires more than just a camera and a skilled photographer. Studio lighting plays a crucial role in shaping the final outcome. Here are some key techniques for beginners to make the most out of their three-light setup:- Main Light Usage: The main light, often called the key light, is the most powerful light source in your setup. It establishes the dominant light and sets the mood for your image. Positioning your key light at an angle allows you to highlight the subject's features and create depth.
- Fill Light Application: A fill light balances shadows and softens contrasts created by the key light. By placing the fill light on the opposite side of the key light and reducing its intensity, you can control the degree of shadows for a natural look.
- Back Light Placement: The back light, or hair light, is fundamental for adding dimension and separating the subject from the background. This light from behind can be angled to highlight the outline, enhancing the subject's visibility and providing a more three-dimensional view.
Advantages of Using a Three-Light Kit
Maximizing Your Set-Up: The Three-Light Kit Approach
Utilizing a three-light studio lighting kit can significantly enhance your photography and video projects. Here's why investing in a comprehensive light kit is advantageous:- Versatility in Lighting: The combination of key light, fill light, and back light allows you to manipulate shadows and highlights with precision. Whether you're working with LED studio lights like the GVM RGB LED panels or traditional softboxes, the flexibility to control each light individually means better control over the final image.
- Enhanced Control: With studio lights, including adjustable LED panels and softboxes, you have the ability to manage brightness, color temperature, and even RGB settings for creative effects. This level of control over your lighting environment enables you to create consistent and high-quality results each time.
- Professional Results at a Competitive Price: While the initial investment might seem higher than single light purchases, a three-light kit often ends up being more cost-effective than buying separate components. Products such as LED panels, light stands, and accessories in a unified kit can often be found at a sale price, offering great value beyond the regular price of individual components.
- Upgrade Your Setup with Complete Accessories: Comprehensive kits come with necessary accessories, like light stands and softboxes, facilitating easy set-up and efficient storage. A popular example includes options with adjustable brightness and color control, which add professional flair to your studio setup, providing phenomenal flexibility.
Common Challenges and How to Overcome Them
Overcoming Common Lighting Challenges in Your Studio
Navigating the world of studio lighting, especially when using a lighting kit with multiple lights, can present some challenges. Here are some of the most common issues you might face and how to tackle them effectively:
- Achieving Balanced Lighting: Ensuring that your studio lighting provides an even distribution without overexposing or underexposing parts of your shot can be tricky. Adjust the position and intensity of each light in your kit, such as softboxes and led panels, to achieve a balanced effect.
- Managing Shadows: The three-light setup can create unwanted shadows if not controlled carefully. Utilize the key light effectively and employ the fill and backlights to soften and reduce harsh shadows on your subject. Consider using softboxes for a more diffuse light source.
- Color Temperature Consistency: Inconsistent color temperature across your lighting can affect the look of your photos or videos. Most kits come with color adjustment features, often controlled via remote or app, to help maintain consistency.
- Equipment Constraints: Sometimes the regular price of a top-of-the-line GVM lighting kit can be daunting. Look for promotions or sale prices to make the investment more palatable. Consider the product’s versatility; for example, some kits offer RGB led options for creative lighting needs.
- Power Supply Issues: Ensure your studio lights are powered correctly and that your workspace has sufficient outlets. Using portable light stands and rechargeable solutions can offer flexibility during shoots.
With these strategies, you'll be better equipped to handle the challenges that come with using a three-light studio lighting kit effectively. Always consider the specific needs of your photography or video project and adjust your setup accordingly.
Choosing the Right Three-Light Kit for Your Needs
Evaluating Your Lighting Needs
When it comes to selecting the perfect three-light studio lighting kit, understanding your specific needs is crucial. Whether you're diving into photography or setting up a video studio, the right choice can make all the difference in your work's quality and efficiency.
Consider Your Budget
Price is often a significant factor when purchasing a lighting kit. Kits vary widely in cost, from budget-friendly options to high-end professional setups. Consider what you're willing to spend and weigh it against the features you need. Look for sales or discounts to get the best value without compromising on quality.
Types of Lights
The type of light in your kit can dramatically affect your results. LED lights are popular for their energy efficiency and long lifespan. If you need versatility, consider a kit with RGB LED options for customizable color settings. Softbox lights are ideal for diffusing light, while panel lights offer a more direct approach.
Assessing Product Features
- Control and Adjustability: Look for kits with adjustable brightness and color temperature. Remote control options can also add convenience.
- Portability: If you plan to move your setup often, lightweight and portable kits with collapsible light stands are beneficial.
- Accessories: Consider kits that come with essential accessories like softboxes, light stands, and carrying cases.
Brand and Reviews
Reputation matters. Brands like GVM and Lume Cube are known for their quality and reliability. Reading reviews and checking star ratings can provide insight into the product's performance. Pay attention to feedback about the durability and ease of use.
Final Thoughts
Choosing the right three-light kit is about balancing your needs with the available options. Whether it's the regular price or a sale price, ensure the kit you choose enhances your photography or video lighting setup effectively.